Pages

Sunday 22 December 2013

Update: 22 December 2013 {3 DAYS TO CHRISTMAS}

3 DAYS TO CHRISTMAS! YAY! :)

Anyways, I thought it would do a short update post today as I don't think I will be posting anything till Christmas.

1) Possible (by possible I mean very likely) Upcoming DIYs
I've been on Pinterest a lot lately and have really been inspired by the DIY projects on there and I decided to try doing some of my own! I really like how my little projects turned out and was thinking of doing a few DIY posts showing you how I make or decorate some stuff to spice up your room. I guess I'll also include some photos or links from the pins I saw that I really liked or that I decided to recreate. I'm sure you'll enjoy doing them as much as I enjoyed it!

2) End of the Year = 3 Major New Posts plus a few other posts!
So ever since about June or July, I've been planning 3 big posts for you guys (it was originally just 2 posts, but I had to split 1 into 2 separate parts!) and I plan to post them towards the end of the year, which isn't that long away anymore! I decided to post them at the end of the year since I was busy pretty much 24/7 this entire year due to O levels, which (thankfully) is looooooooooooooong gone. But till the end of the year, I will also be posting a few other posts, such as a holiday haul, a review and of course DIYs.

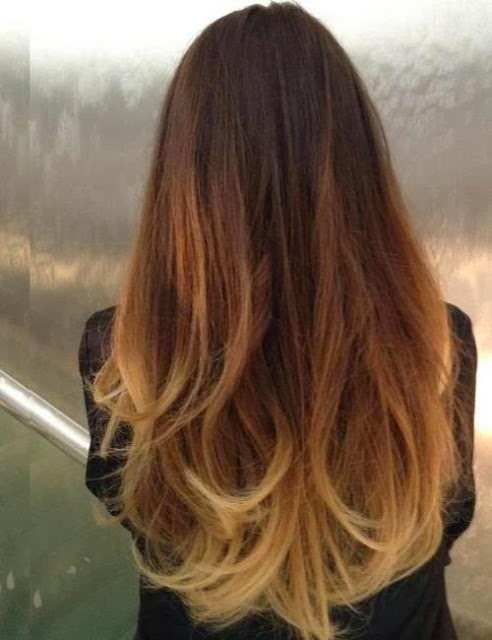
3) Change in hair colour?!
Okay, not exactly all my hair, but, I plan on doing my own ombre hair soon (it might end up as a dip dye instead). I'll definitely take some pictures of the process and do a post about it. I plan on doing a pink ombre, so (hopefully) from my natural hair colour, to darker pink and finally light pastel pink at the very tips. I initially wanted it to go from my natural colour to pastel pink, but I heard that your hair has to be near white for the pastel colour to be picked up properly, so I thought it would be best just to try the pastel at the very tips, so if it doesn't pick up properly it still won't look that bad. I hope everything goes well. I will obviously have to bleach my hair first since I have naturally dark brown hair. I've never bleached my own hair before, and I'm kinda scared I'll mess up the ombre effect. I also hope my hair won't be too dry after the bleaching, although I know it probably will be. After doing a little research, I realised that I would have to bleach my hair twice, the first time to bring the dark brown to an orangey colour, and the second time to make it blonder. This will really dry out my hair, so I'll have to go all out when it comes to conditioning my hair.


4) New Eye-shadow Palette
I was actually thinking of getting a new eye shadow palette some time soon. I've always been debating which naked palette I should try, whether the Naked 1 or Naked 2. I know they recently released a Naked 3 palette, which has more rosy toned colours. I do want to get that palette, just that I don't think it's available yet here in Singapore (maybe it is, its just that I haven't checked Sephora since I've been back from vacation). I'll get it eventually. There is also a Naked Basics, which only has 6 shades, but since half of those are highlight shades, overall it didn't appeal to me. So I'm still stuck between choosing either the Naked 1 or Naked 2 to get. The Too Faced palettes also appeal to me, especially the Boudoir Eyes palette. I'll go to Sephora soon and see these palettes up close, I might just end up not getting any actually.

Naked 1 Palette

Naked 2 Palette

Naked 1 and 2 Comparison
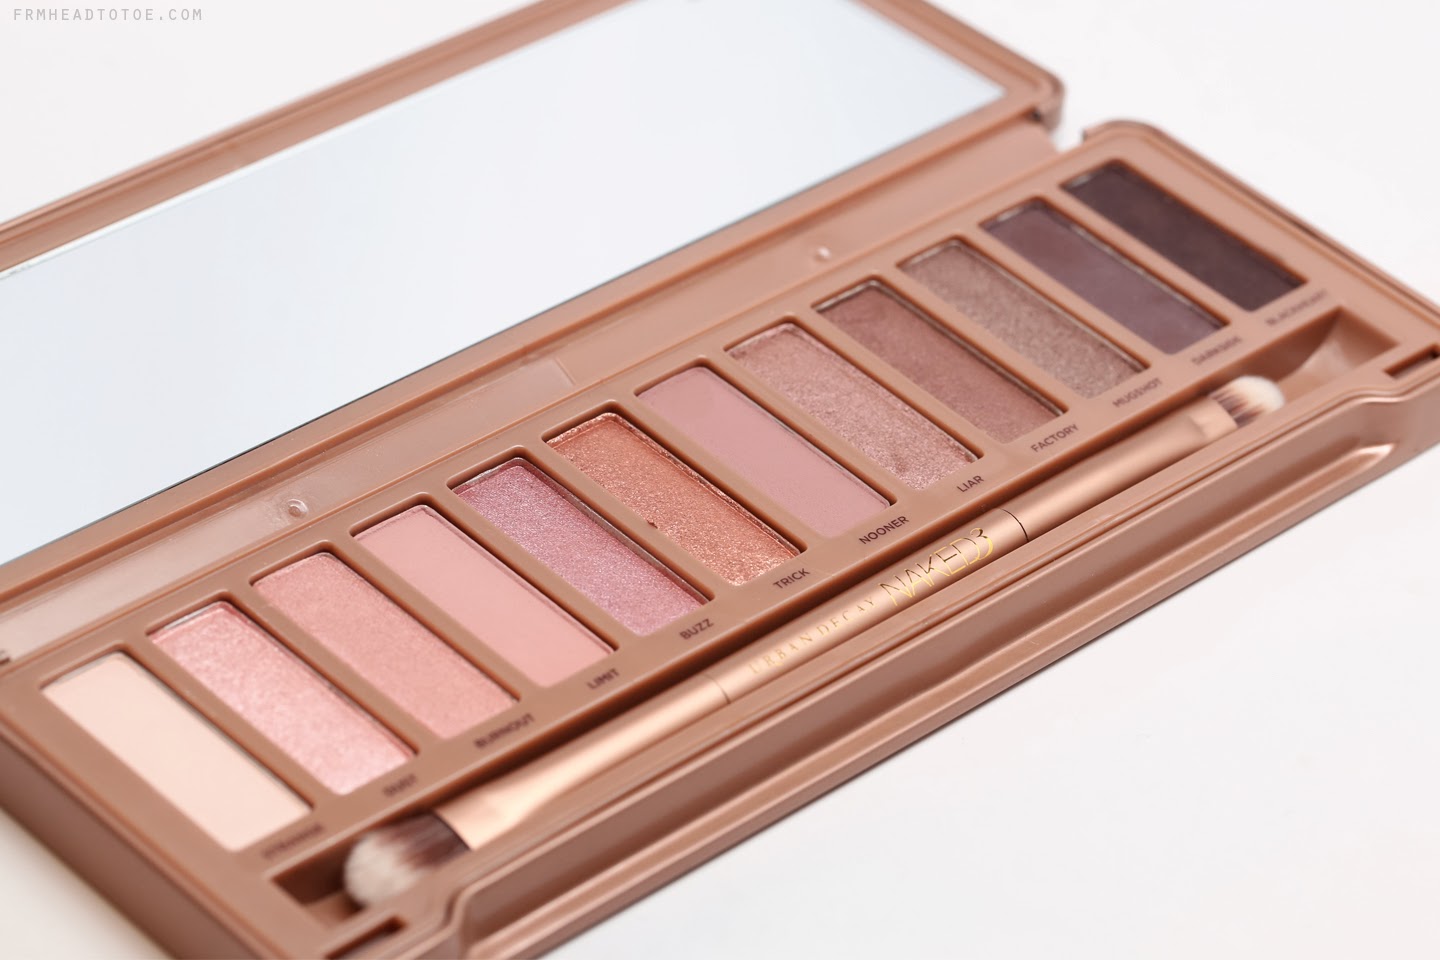
Naked 3 Palette

Naked 1, 2, and 3 Comparison

Too Faced Boudoir Eyes Palette

Too Faced Boudoir Eyes Palette

** All pictures are from Google :) **

Friday 20 December 2013

Hair Colouring Trends: Hair Chalking, Dip Dye, Ombre, Reverse Ombre, and Hair Veiling ♥

Hey guys!

So since I've recently been really into hair dyeing and colouring, I thought I would do a post of (what I find) really nice hair trends I've been noticing and maybe this can give you some ideas if you're thinking of dyeing your hair :) *Images are not mine!*

Hair Chalking
I did a post over a year ago about the sudden hair chalk craze (as while as the pros and cons of chalking your hair) as at that time everyone seemed to be talking about it and doing it. However, I've noticing that now (at least where I'm currently living, Singapore) hardly anyone is talking about it. But I do know that in countries like America, hair chalk is becoming more readily available and can easily be found in beauty sections of drug stores and even grocery stores, indicating that there is still a demand for hair chalk. That is why I find that hair chalking is still a trend and included it in this post! *NOTE: Although people usually use hair chalk just to add streaks of colour, with a lot of patience you can achieve a dip dye or ombre look*


**Dip Dyeing and Ombre**
Before I talk about them separately, I would like to clear a common error people have with these two techniques. Most people think that dip dyeing and ombre-ing are basically the same thing and use the terms interchangeably. However, they produce two very different results. Read on to know more about the different results...


Dip Dyeing
In dip dyeing, the result you get is simple, it will look like you basically just dipped the ends of your hair into dye, meaning that there will be a distinct line as to where the dye is. Doing this on your own hair is very easy, a lot easier than trying to achieve an ombre look, especially if you are not a hair stylist or have no experience in hair dyeing.


Ombre
In ombre, you are transitioning/fading from a darker colour to a lighter colour, so there will be a gradient of colours, rather than just one distinct line. Ombre looks really nice with curled hair and I personally prefer ombre compared to dip dye. Ombre is also good for people who want a new colour in their hair but don't want to bleach or dye all their hair


Reverse Ombre
Okay, so you know what an ombre is. A reverse ombre is basically, well, the exact opposite of an ombre. Instead of transitioning from a darker colour to a lighter colour, hair will transition from a lighter colour (ie: Blonde) to a darker colour (Brown) in reverse ombre. This effect of transitioning from a light colour to a dark colour is also nice for other colours of hair, like transitioning from light pink to a darker pink near the tips.


Hair Veiling
Not many people know of this hair dyeing technique, but those who do love it! Hair veiling is adding colour to 'hidden' sections of your hair, for example, the section of hair along your neck line on the back of your neck, which ,when your hair is let down, will be hidden by your top layers of hair. The hidden sections can only be seen if your hair is styled a certain way, for example, if you tie your hair into a high bun.


After seeing these different hair trends, I hope its given you some ideas for your next 'do! :)

Wednesday 18 December 2013

Update: 18 December 2013 {7 DAYS TO CHRISTMAS}

Hey guys!

So I'm back from my vacation! :) I don't really have much to write about for this update post, but I thought I'd still do one just so I can get use to updating weekly.

Anyways, one new thing I should post about is that I HAVE PINK HAIR. Okay, not really. I just dyed a streak of my hair pink. I bought the dye when I was overseas and used it the moment I reached home. The dye is actually meant for bleached blonde hair, but I just used it on my streak of hair which is for a lighter shade of brown compared to the rest of my hair (I lightly bleached it before, that's why its lighter).
I'll post more about the dye in an upcoming post, which brings me to my next point....

A HOLIDAY HAUL :) In this post, I'll just share the items I bought while overseas and talk a little about them since I have used most of them. I'm sure you guys will enjoy it!

Along with a holiday haul, I also have other posts coming up, so stay tuned! :*

I think that's about all for this update post
x

Thursday 28 November 2013

Review: Sally Hansen Nail Growth Miracle Salon Strengthener

Hey guys!

I thought I would just do a little review on the Sally Hansen Miracle Growth product. I got it as I had cut my nails super duper short and I really couldn't wait for them to grow back. I thought this would be a good product to try out and see if it really does work. You apply it just like how you would apply a nail polish. They says to apply one thin coat on a BARE NAIL every other day. I've read review before purchasing this product and many said they don't see any results if you don't apply it on a bare nail, free of any nail polish or anything. I followed this instructions for about a week and so I'll basically talk about the results I got from this product.

*I must apologise for the lack of pictures. When I was actually using the product for the first time, it didn't occur to me to take a before picture and stuff as I didn't think I would do a review on it. I might have a separate post where I basically cut my nails really short again and use the product, but this time I'll take before, after and during pictures and have it up on that post.*

1 DAY AFTER FIRST APPLICATION
So here's what I did. I applied on my bare nails at night and went to bed. The next day, believe it or not, there was a visible growth of my nails. It wasn't a huge difference, like I didn't wake up with claws or anything, but I could clearly see it. Before I applied the product, my nails didn't have any of the white tip. I woke up the next day with a very small white tip. I know my own nails, therefore I know that the white tip won't grow so fast if I have cut my nails recently. This meant that the product had actually worked. I was super happy and continued to follow the instructions.

2 DAYS AFTER FIRST APPLICATION
I removed the initially coat that I applied 2 days ago and reapplied a fresh coat. The white tip of my nails was, again, slightly longer than it was the previous day. I really believed this was a miracle product and was happy that I tried it out.

3 DAYS ONWARD FROM FIRST APPLICATION
I followed the instructions and reapplied the product to bare nails every other day. However, the product seems to not work anymore. Like I said previously, I know my own nails and I know the speed they grow at. I know that by a week, they would roughly been at a certain length, and so on. Even after reapplying every other day, my nails seemed to be growing at the same speed as they would without the product. For example, the length of the white tip after a week of using the product looked exactly similar to how it would without the product. I was really disappointed as I really thought that this product would help my nails to grow faster but it seemed to stop working just after a few days of using it.

OVERALL
Overall, I do not recommend this product. This is my second product from Sally Hansen that I really do not like and find that it is a waste of money. The first was their French Manicure pen that was too watery and the colour was not opaque enough to be used for a French manicure style nail. (Review of the French Manicure set here) I think that Sally Hansen should just stick to making nail polishes as I really do LOVEEEEEEEEEEE all their different ranges of nail polishes. But I seem to always be disappointed with their other products. I know it's just two other products that I've tried beside their nail polishes, but the fact that these two products have not performed the way I thought they would really makes me doubt their other products. However, with that being said, I still may try other products from Sally Hansen just to try out and see if they work, but at the moment the only products I would recommend from Sally Hansen are their nail polishes but this is just my personal opinion.

SIDE NOTE
Like I said towards the start of this review, I may do another post where I basically cut my nails short again and use the product again, but this time I will take images of my nails along the process of them growing. I will only apply the product to one hand, and leave the nails on the other hand to grow naturally. That way you will be able to compare them side by side as they grow.

Update! 28 November 2013: I'M FINALLY BACK :*

Hey guys!

I know I haven't posted anything or updated you guys for a really long time. I was busy studying O levels ;_; Anyways, I'm glad that its over now! :D Actually it was over a long time ago, my last paper was on 15 November. My prom was on the 18th. I had so much fun there, but I'm really going to miss my secondary school D: Who knows what lies ahead for me :)

Okay, in terms of this bog, I will have two (maybe three if I split one post into two separate ones) major posts planned ahead :) But I'll be posting them maybe towards the end of December. Can you guess what posts they will be? (; I might also do a review on the Clarisonic Mia 2 soon (Yes, I just recently got it) like maybe a first impression? I'll also try to keep up with my weekly updates and stuff! However I'll be going overseas from early December to mid December so I won't be able to post during that time unless I bring my laptop, which I may not. But I can guarantee that I'll do weekly updates when I'm back on this little red dot! :3

I think that's all for today. I better get back to packing. My luggage has been out for about a week but all I have in it is a pair of boots :/ Byeeeeeeeeeeeeee :*

Tuesday 9 July 2013

♥ Summer Haul 2013! ♥

Hey guys!
So over the course of this Summer, I have done some shopping and decided to share it in a collective haul! I didn't get that many things as I had expected, so hopefully next year's Summer haul may have more things :) I also might do a collective haul at the end of December since I do have holidays from November to December. So maybe I will have more items then. But anyways, lets get started! :)

FROM NEW LOOK
During the sales period, New Look always has good deals that I can't pass up, and usually it's their shoes. They did have quite a selection of clothes on sale but it didn't really interest me. So I just ended up getting a few items that were pretty heavily discounted. :)

'Cow Girl' Coin Purse.
Originally $9.90. Got it for $3.90


Purple Heels
Originally $63. Was on sale for $31.50


Light Brown-ish Wedges
Originally $69.90. Was on sale for $19.90 :D


FROM SEPHORA
Even though Sephora did have a sale going on, I wasn't really looking for anything. My mum got me this item as a gift.

Justin Bieber Someday Perfume 100ml
It was originally $98 but got reduced to about $76 due to it being 20% off.


FROM COTTON ON
As with New Look, the clothes didn't really interest me.

Paper Lanterns
Originally was either $25 or $30 (not too sure). Got it for $5


Cat shoes :D
Not sure of it's original price, but got it for $15 :)


Tiger Tank Top
Again, not sure of it's original price but paid $5 for it


♥ Aqua Blue Sports Shoes ♥
Omg, I love these soooooooooo much <3 They are super comfy but I actually kinda regret buying them cos I know I'll be super sad once they are dirty or worn out :(
These were not on sale, hence I paid the original price of $39.95


FROM FOREVER 21
I didn't get any clothes or shoes from here as I found it quite pathetic that the items on sale were the same items that were on sale in March. It wasn't like just a few items from their previous sale that was brought over to their current sale, every item on the rack was from their previous sale. So this really sucked as these items were the items that I didn't like and passed in the previous sale. So it was disappointing that I didn't find any cute stuff in the sale. I did see some cute muscle tanks while I was there but I didn't end up getting them as I have way too many muscle tanks, but I just might go back to get one since I can't stop thinking about it (;

Make Up Bag $10